Skin retouching tips in Photoshop CS4
The craft of professional skin retouching is the ability to render perfect skin without giving your model the appearance of a plastic-fantastic shop window mannequin.
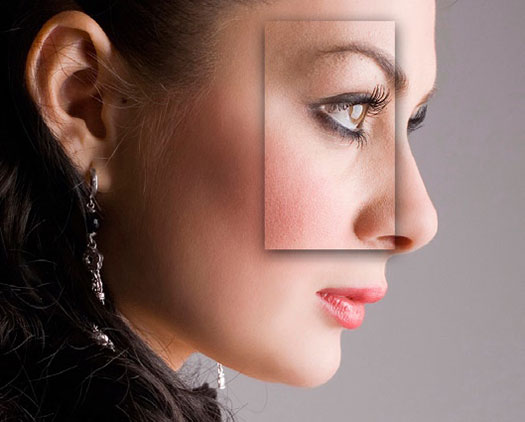
The image used in the project is a section of a larger image from iStockphoto.com (image number 05009631). A 12-megapixel DSLR with a professional grade lens at point blank range and a generous amount of in-camera sharpening is a very cruel combination for showing every minor imperfection in the skin’s surface (check out the nose). The technique in this tutorial can be used at full throttle to render the skin suitable for use in a skin care advertisement, or toned down a little to return the skin to something approaching normal (rather than how the camera lens captured it).
Step 1
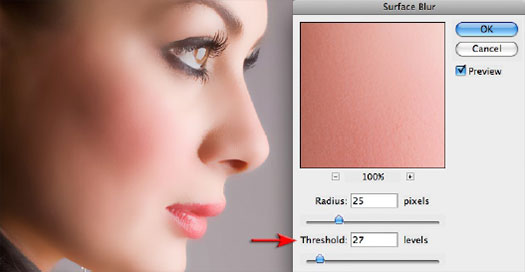
Start the process of smoothing the skin by duplicating your background layer using the keyboard shortcut Ctrl + J (PC) or Command + J (Mac) and then go to Filter > Blur > Surface Blur. This filter, unlike the Gaussian Blur filter has a ‘Threshold’ slider that, if used correctly, will leave edges crisp and sharp whilst blurring the surfaces inside the edges. This will ensure there are no nasty haloes around the edges of your subject as a result of the blurring process.
Step 2
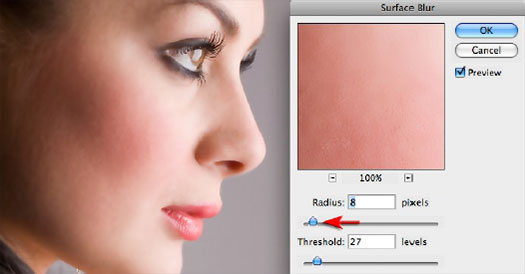
It is important to get the balance right between the Radius and the Threshold slider settings for each and every image (there is no one ‘perfect recipe’ that suits every image). To get a feel for what these two sliders do, set them both to a value between 20 and 25. Now move the Radius slider lower until you detect the surface tone becoming ‘mottled’ or ‘blotchy’ and then move it higher again until the surface appears very smooth. Finding the minimum radius that renders the surface smooth is your goal here.
Step 3
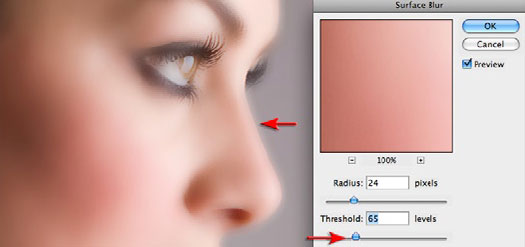
Now drag the Threshold slider higher until you see haloes appear around the edges of your subject. Back the slider off to a point where all of the haloes disappear. If you continue to move the slider lower, after the haloes have disappeared, you will start to re-introduce the finer detail that was removed the by the Radius slider. Try to make the surface as smooth as possible at this stage as we will reintroduce the texture of the skin in a later step.
Step 4
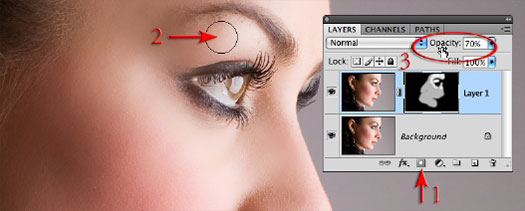
Select OK to apply the Surface Blur filter and then hold down the Alt key (PC) or Option key (Mac) and click on the Add layer mask icon at the base of the Layers palette. This will add a layer mask filled with black that conceals the surface blur on Layer 1. Select white as the foreground color in the Tools palette and then choose a soft-edged brush and set the opacity to 60-80% in the Options bar. Paint to reveal the blur in the areas of the skin only. You do not need to be too critical about accuracy as areas of fine detail such as the eyelashes and the contours of the face have already been preserved on the Surface Blur layer. You will, however need to avoid painting over areas such as the lips to ensure fine detail is not lost in these areas. Paint a second time to reveal additional softening where needed.
Step 5
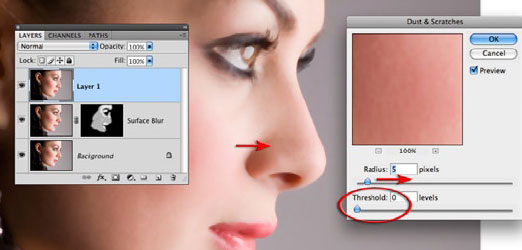
In this step we will eliminate minor imperfections in the skin that the surface blur filter could not smooth over. With the top layer selected hold down the Ctrl + Alt + Shift keys (PC) or Command + Option + Shift keys (Mac) and press the letter E to stamp the visible elements of the project to a new layer. Go to Filter > Noise > Dust & Scratches and set the Threshold slider to 0. Raise the Radius slider just enough to remove any large skin imperfections. Don’t worry about the lack of texture at this point in time.
Step 6
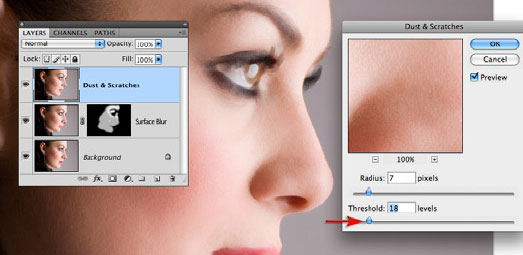
Raise the Threshold slider to reintroduce surface texture but stop just short of the point where the larger skin imperfections start to reappear. Select OK to apply the filter and then hold down the Alt/Option key and click on the ‘Add layer mask’ icon at the base of the Layers palette to conceal the effects of this layer.
Step 7
Select the Brush tool and white as the foreground color in the Tools palette and set the Opacity to 100% in the Options bar. Zoom in to 200% and paint to remove any imperfections. Hold down the Spacebar and click and drag to move the image in the image window so that you can navigate around the surface of the skin to look for additional imperfections. The skin should now be rendered smooth but with realistic surface texture and free from all minor imperfections.
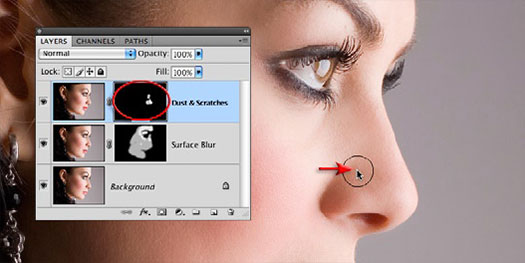
The skin should now be rendered smooth but with realistic surface texture and free from all minor imperfections.
